DIY SHELTER GUIDE (EXTREME EDITION!)
So you want to party too? Excellent! Good shelters are always needed and your local community cats will thank you for your efforts when the temperature drops. We are happy to share our process for the tote shelter design we optimized for assembly line production. These shelters have proven to hold up valiantly in the field for a few years if the straw is replaced every season. We will be the first to admit that this undertaking is not for everyone, but we hope there may be some tips that help inspire others to tinker with the process and give it a go!
Remember that you will need a good deal of space to wrangle all the supplies as well as tools and talent. This production process works best for batches of 50 or more shelters. Ideally you will need at least 3-4 people working together to tackle this mission. Volunteer count really depends on the number of shelters you are planning to complete, but more hands make for lighter work.
If all components are purchased in bulk at retail, the total cost per shelter (including inbound shipping, but excluding labor and tools) is approximately $36.00 ea. However, we have been able to greatly reduce the per unit costs by soliciting material donations from suppliers and locating a local source for used styrofoam shipping containers.
This is not meant to be a definitive guide. There are many other possible variations that could be more practical or cost effective for your team. We have been very fortunate to be able to find sponsors, collect donations and work with professionals armed with specialized tools. We recommend adapting this process to your comfort level and available tools / materials. We will provide links to the vendors we opted to use since everything fits together really well. It is worth noting that we have no affiliations with these vendors and are not receiving any commissions, so feel free to do your own recon.
AS ALWAYS, USE CAUTION, WEAR EYE PROTECTION AND ALL OTHER APPROPRIATE PERSONAL PROTECTIVE EQUIPMENT! YOUR SAFETY IS CRITICALLY IMPORTANT AND SHOULD NEVER BE TAKEN FOR GRANTED! POWER TOOLS ARE DANGEROUS - ESPECIALLY WHEN EQUIPPED WITH 6” HOLE SAWS! IF YOU ARE NOT EXPERIENCED WITH POWER TOOLS, BY ALL MEANS RECRUIT SOMEONE FOR YOUR TEAM THAT IS CAPABLE, WILLING AND ABLE TO SAFELY TAKE ON THAT RESPONSIBILITY. CATSA WISHES YOU WELL, BUT WE MUST CLEARLY STATE THAT WE WILL NOT BE HELD LIABLE FOR ANY DAMAGES ARISING FROM ANY PERSONAL INJURIES SUSTAINED AS A RESULT OF THIS FABRICATION GUIDE. YOUR PARTICIPATION IS COMPLETELY VOLUNTARY AND YOU ASSUME FULL RESPONSIBILITY FOR YOUR ACTIONS AND ANY RESULTING BODILY INJURY, LOSS OR DAMAGES. IF YOU PROCEED, PLEASE DO SO SAFELY! ALSO, NEVER FORGET THAT WE LOVE YOU.
SUPPLY LIST:
Sterilite totes
ProPak coolers
2” thick insulation board
Adhesive Velcro (hook and loop)
PVC strip curtain roll
Straw bales
Food grade diatomaceous earth
Dried catnip
Cardboard or Luan plywood scraps for templates
(Please see below for additional details on each item)
TOOL LIST:
Safety glasses
Respirators with HEPA, N100, P100 or R100 cartridges for foam cutting
Tape measure or ruler
Hot knife kit for foam cutting, extra blade & wire cleaning brush or a jigsaw & blade pack
Drill and 6” hole saw
Deburring tool or utility knife
Table saw or track saw
Several pairs of good scissors
Once you have all of the supplies collected, tools on hand, and an eager crew of volunteers at the ready, we strongly recommend building a prototype together first to be sure everything works as anticipated and everyone understands the process.
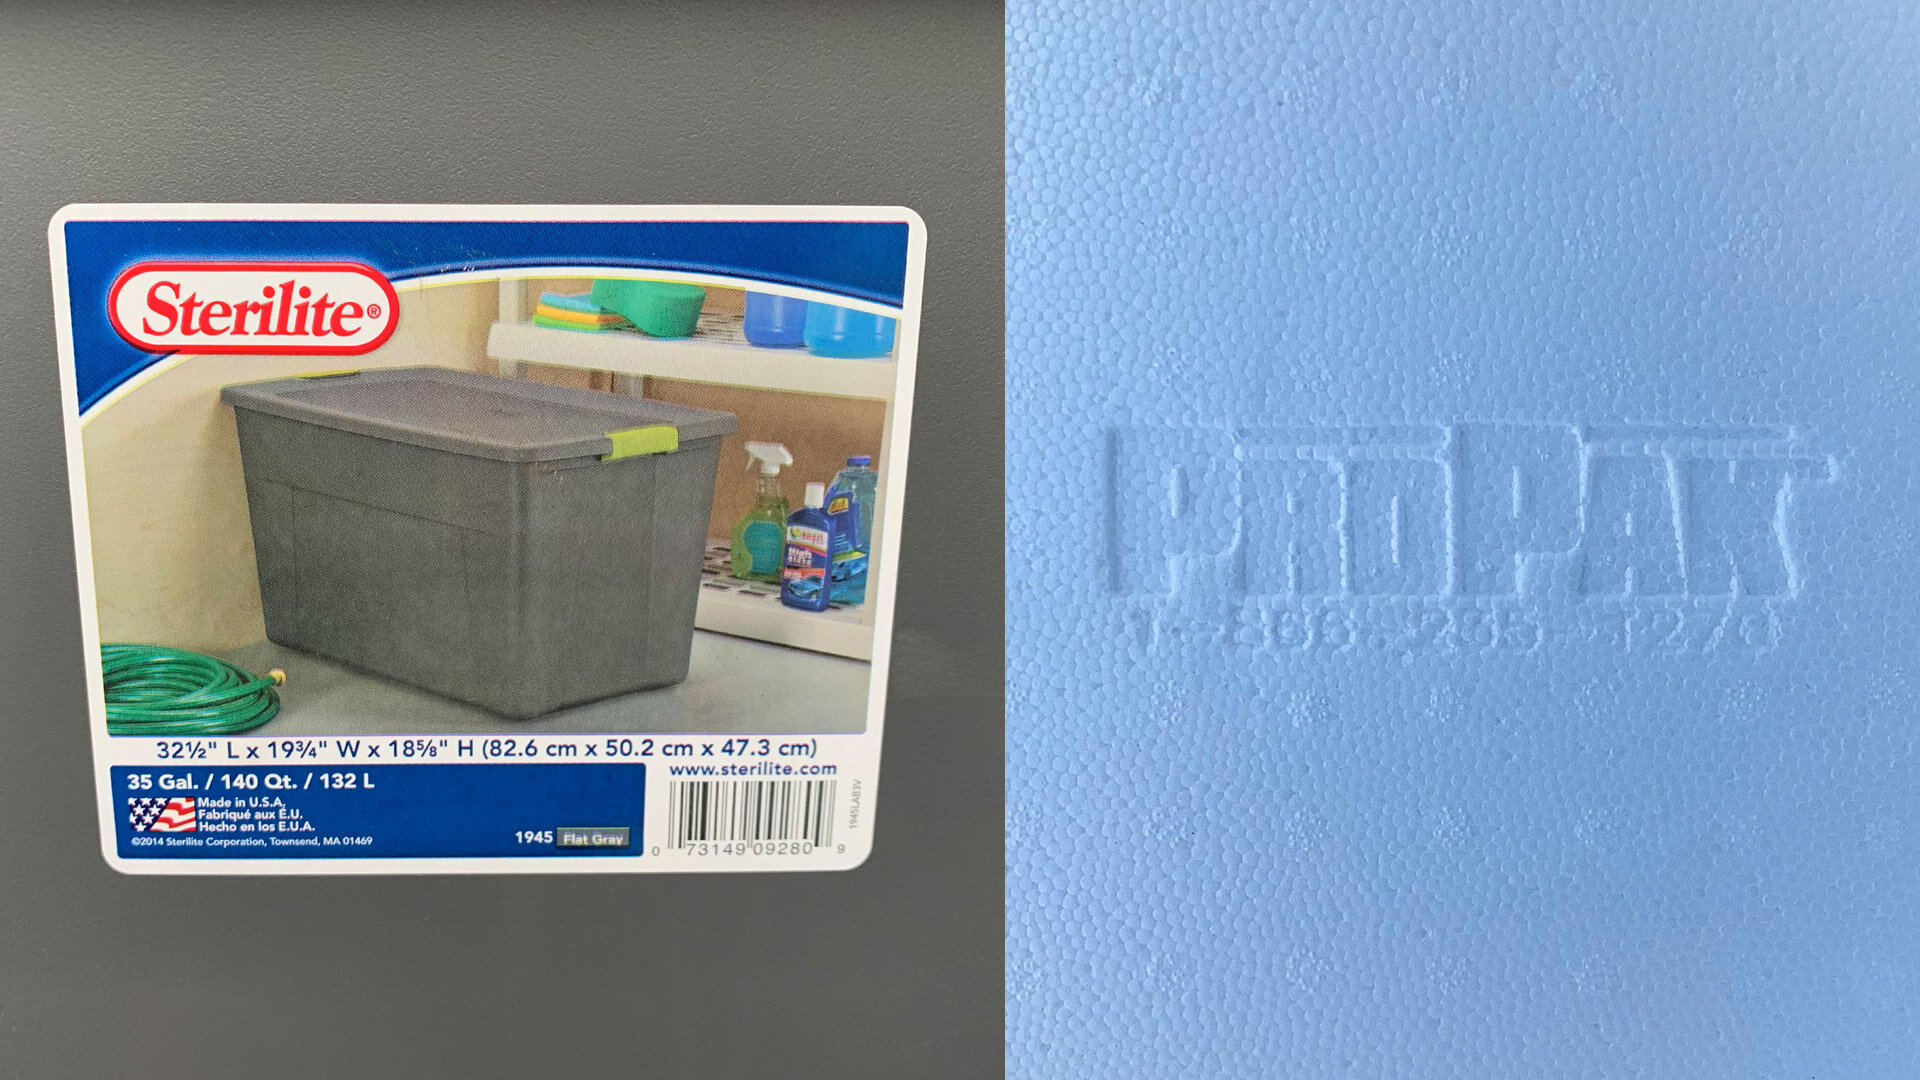
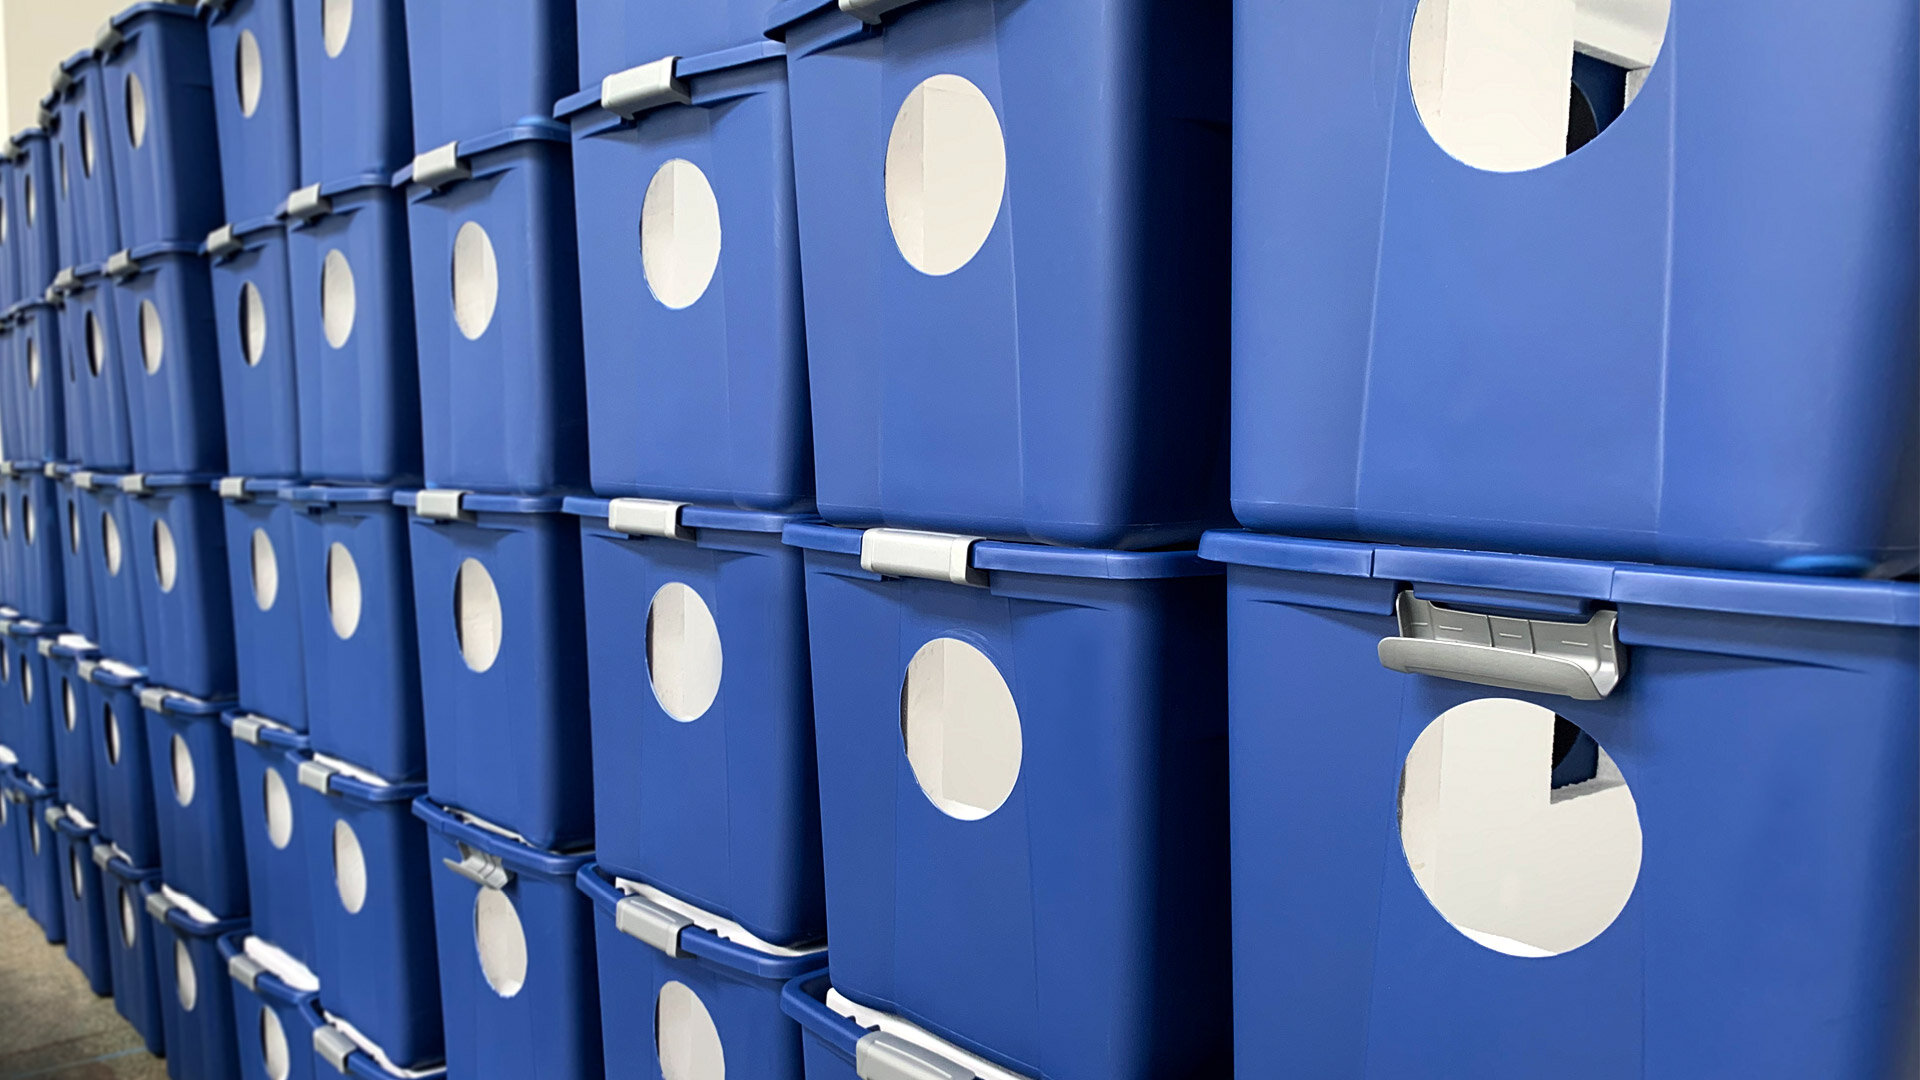
STERILITE 1945 32.5” x 19.75” x 18.625” 35 GALLON TOTE
These killer and affordable totes are the key to this entire recipe. They are typically available in blue or grey and can be found readily online, but at the time of writing, Walmart.com had the best price we could find at about $12 each. It is certainly worth shopping around for these as prices seem to be all over the place.
LIFOAM PROPAK LF27255 20.5"X13.25"X12"ID 1.2# WHITE PCF EPS FOAM MOLDED COOLER W/1.5" WALL
Lifoam makes the cooler we are using inside this shelter design. According to our conversations with their kind sales team, Lifoam does not sell ProPaks coolers directly to end-users unless you plan to purchase a full semi truckload. (Approximately 700 coolers). The best bet is to contact a local distributor or locate a source for recycled or used shipping coolers. There are certainly other cooler purveyors that offer similar sizes, but if the cooler size changes, please be aware that the dimensions we provide throughout this guide will need to be adjusted so your design can accommodate the cooler you have chosen.
The distributors below are able to provide quotes for the same cooler we used and can coordinate shipping via freight for larger orders. Please be aware that the shipments come with at least 15 coolers per pallet. They are very light but bulky, so ideally they should be delivered to the assembly location.
4’ x 8’ SHEETS OF 2” THICK RIGID INSULATION FOAM
The insulation we were working with for the Mega Shelter Party was donated by a local construction equipment company and arrived in 4’x8’ sheets that were 2” thick. The foam is readily available at building supply and hardware stores. Each tote requires 2 different sized pieces, so we worked out a maximum yield per sheet of 7 pairs of 2 parts. When calculating the number of sheets required, factor 7 complete shelters per sheet of insulation. There are more specific instructions for cutting further on down in the guide.
VELCRO 1” WIDE ADHESIVE-BACKED HOOK AND LOOP FASTENERS
We have opted to use Velcro to adhere the flaps to the tote since they allow the door to be removed or repositioned easily. When first introducing shelters to a community cat or colony, we have found it may be easier to remove the doors until the cats get used to using the shelters. Velcro is best purchased in bulk reels as there tends to be a substantial mark up on smaller pre-cut quantities. The two most common adhesives used for hook and loop strips are rubber based or acrylic based. While rubber is more cost effective, we recommend the acrylic adhesive as it is more durable over the long haul. Acrylic adhesive can withstand wide temperature variations and UV exposure without degradation. hookandloop.com sells 75’ reel pairs (1 hook and 1 loop) and their pricing is competitive. Keep in mind, each shelter has two door flaps and each flap requires 5.5” of both hook and loop Velcro. The 75’ rolls can yield just over 160 door flaps if you measure accurately. That should cover 80 shelters with a couple of extra strips left over.
Pro tip - some sites (including hookandloop.com ) will offer cut-to-size services and that makes things much easier.
6” WIDE X .06” OR .08” THICK SMOOTH PVC STRIP CURTAIN ROLLS
For our shelters we use .08” (2mm”) thick PVC that comes on 6” wide rolls. This material is most commonly used for large refrigerated door curtains in commercial settings. PVC is durable, economical and clear, which allows visibility in and out of the shelter. The door design we have had the most success with is just shy of 6” wide and 7.25” long. A 100 ft. roll will yield just over 160 door flaps if measured accurately. That will cover 80 shelters with a couple of extra flaps left over. We purchased our material through pvcstrip.com.
STRAW BALES
The straw acts as a natural insulator that the cats can curl up in to stay warm and it will allow moisture to evaporate. Local garden supply centers or feed stores are a great place to find straw bales. They are inexpensive and should last through a season inside the shelter. We estimate 1 standard sized straw bale will be enough to make cozy bedding for 10-12 shelters.
FOOD GRADE DIATOMACEOUS EARTH
Adding a small sprinkle of this wonder-powder to the straw will help prevent fleas, ticks and other creepy crawlies from sharing the fine shelters you have made for your furry friends. We ordered ours from chewy.com.
DRIED CATNIP
We all know cats love it, but remember this is just to act as an attractant to the shelter. Use sparingly. The intention is not to throw a cat-rave-in-a-box, so you should not need very much. We got some dried leaves from a friend who grows her own supply and just a crushed up leaf or two does the trick!
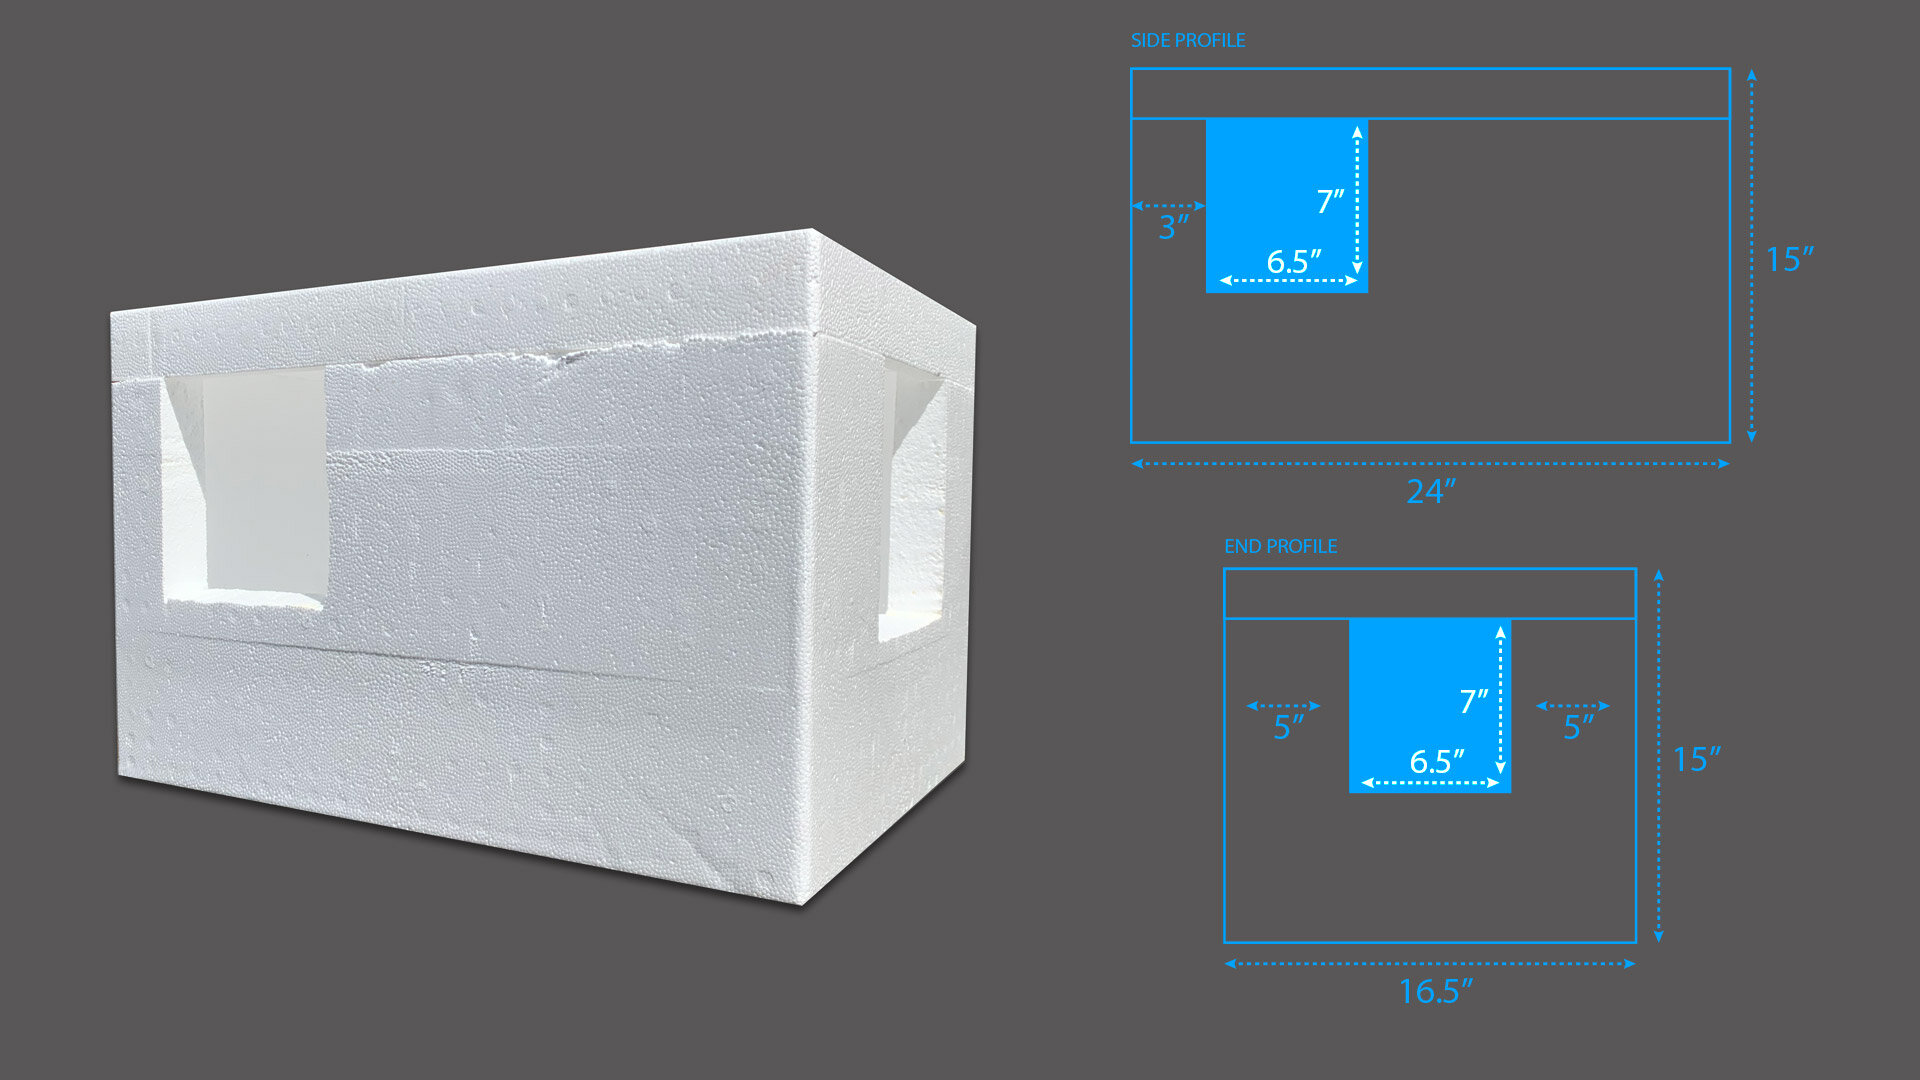
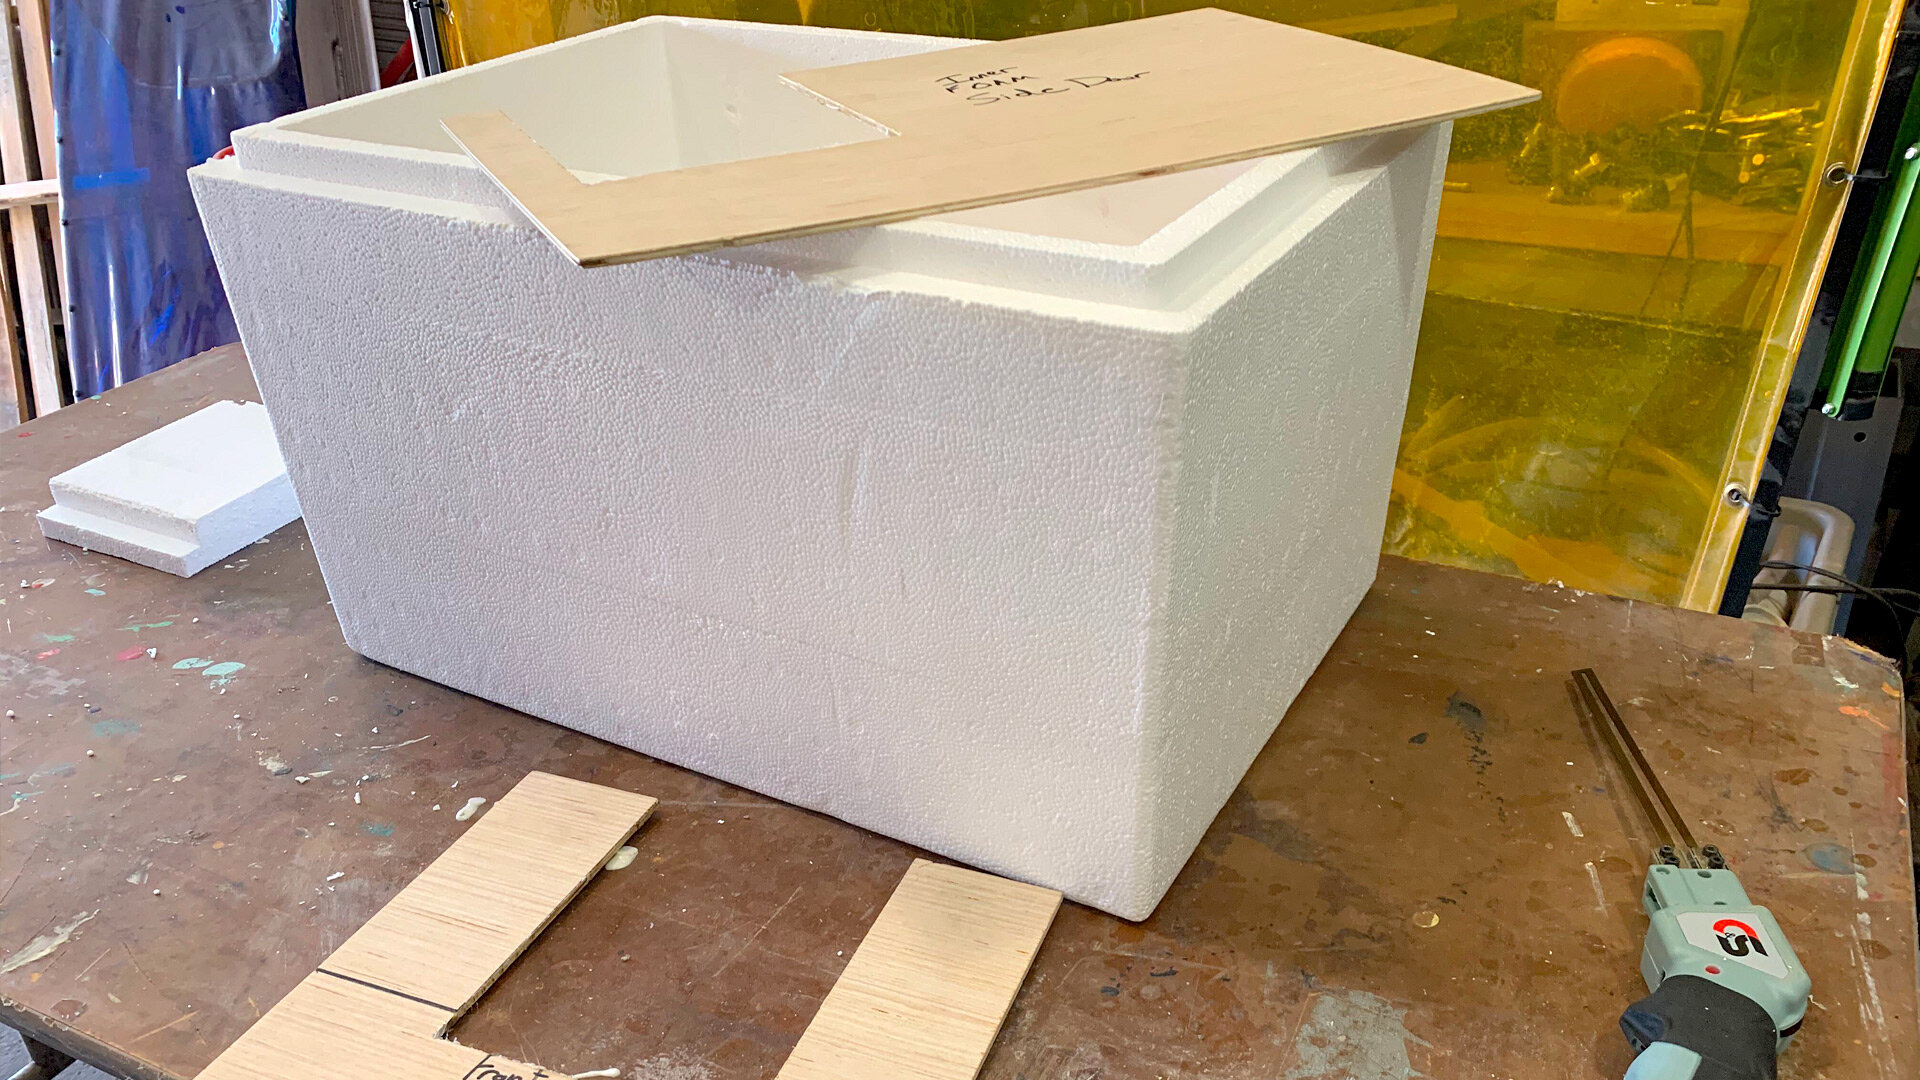
Once your team is ready to go, we will begin by cutting two doors into each cooler. To keep this quick and easy, we created some thin plywood templates that matched the dimensions called out in the diagram. Using the templates, we could line things up and slice away without measuring repeatedly. The cooler cutting could be done with a knife, jig saw or perhaps even that electric carving knife you never actually use, but we were not exactly thrilled about wielding a high speed serrated blade for production when there are tools better suited to the job. We opted for a hot knife specifically designed for cutting and shaping foam. Plan to get extra blades and a wire brush to keep the blade clean as you go. We made it through about 50 coolers before our blades began to deform from the heat. If you go this route, you will absolutely need a high quality respirator with cartridges designed to filter noxious fumes. Working in a well ventilated area away from the rest of the team is also mandatory! It also goes without saying that the knife can get crazy hot and should be handled with the utmost care. All the cut-out door sections should be saved as they will be used as insulation during assembly. Be certain you are cutting into the correct end of the cooler every time so your doors line up with the tote! See the diagrams for reference.

Holes in totes! We used square doors in our earlier shelter versions, but even with practice they still took time to do efficiently and we never settled on the right tools for the job. Since we were aiming for speed and simplicity, the square graduated to a circle, which in turn required a new door flap design, and that meant lots more trial and error. Lucky for you, we are skipping the tedious part and have a door template for you.

Again, once measurements are sorted out, templates are your friend. This one is designed to slip into the top turned over lip of the long side of the tote and then be slid left until it stops at the edge. As you can see, we skipped the “put marker dot in hole” step and went straight to drilling a pilot hole once we knew we were consistently landing in the right place.
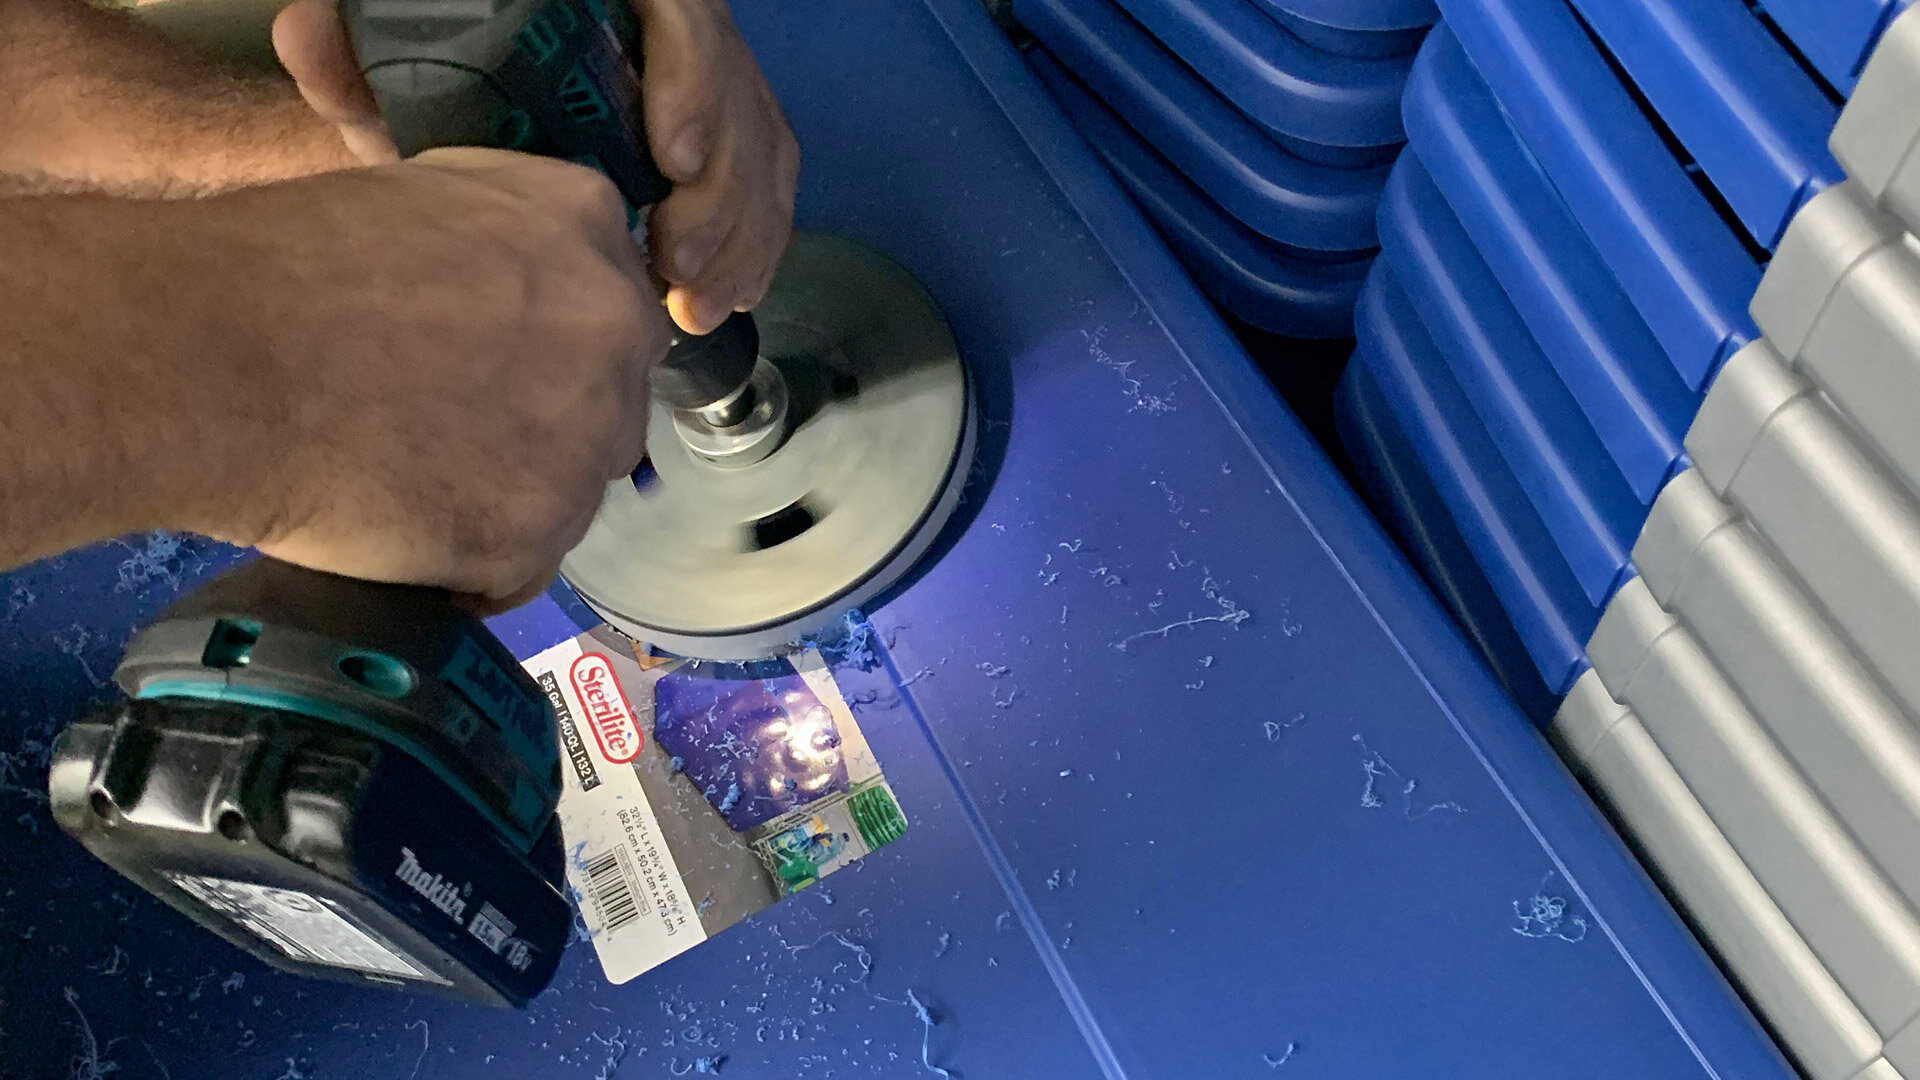
Now this is the super gratifying and potentially rather dangerous part, so please use extreme caution. Typically, a 6” hole saw is used to install recessed lights in drywall ceilings and these beasts can be found at most home improvement stores. We put one in a drill press and frankly it was frightening to behold since the kill switch was too far away to be useful if you needed to shut things down immediately. Do not do that! It felt far safer to put the hole saw in a cordless drill since your finger is directly on the power trigger. (After all, this is how a recessed light would typically be cut in.) The key thing to be aware of is that this set up must only be pointed at objects that need a big hole cut into them rapidly. We laid the totes on the floor, braced them well and went to town cutting holes on the long sides. With one person prepping and one person drilling you can move pretty quickly. By all means do keep both hands on the drill as it will kick with a good deal of torque when the hole saw bites into the tote. PLEASE REMEMBER TO KEEP FINGERS AND ALL BODY PARTS WELL CLEAR OF THE HOLE SAW! BE CAREFUL AND DO NOT LOSE YOUR FOCUS!
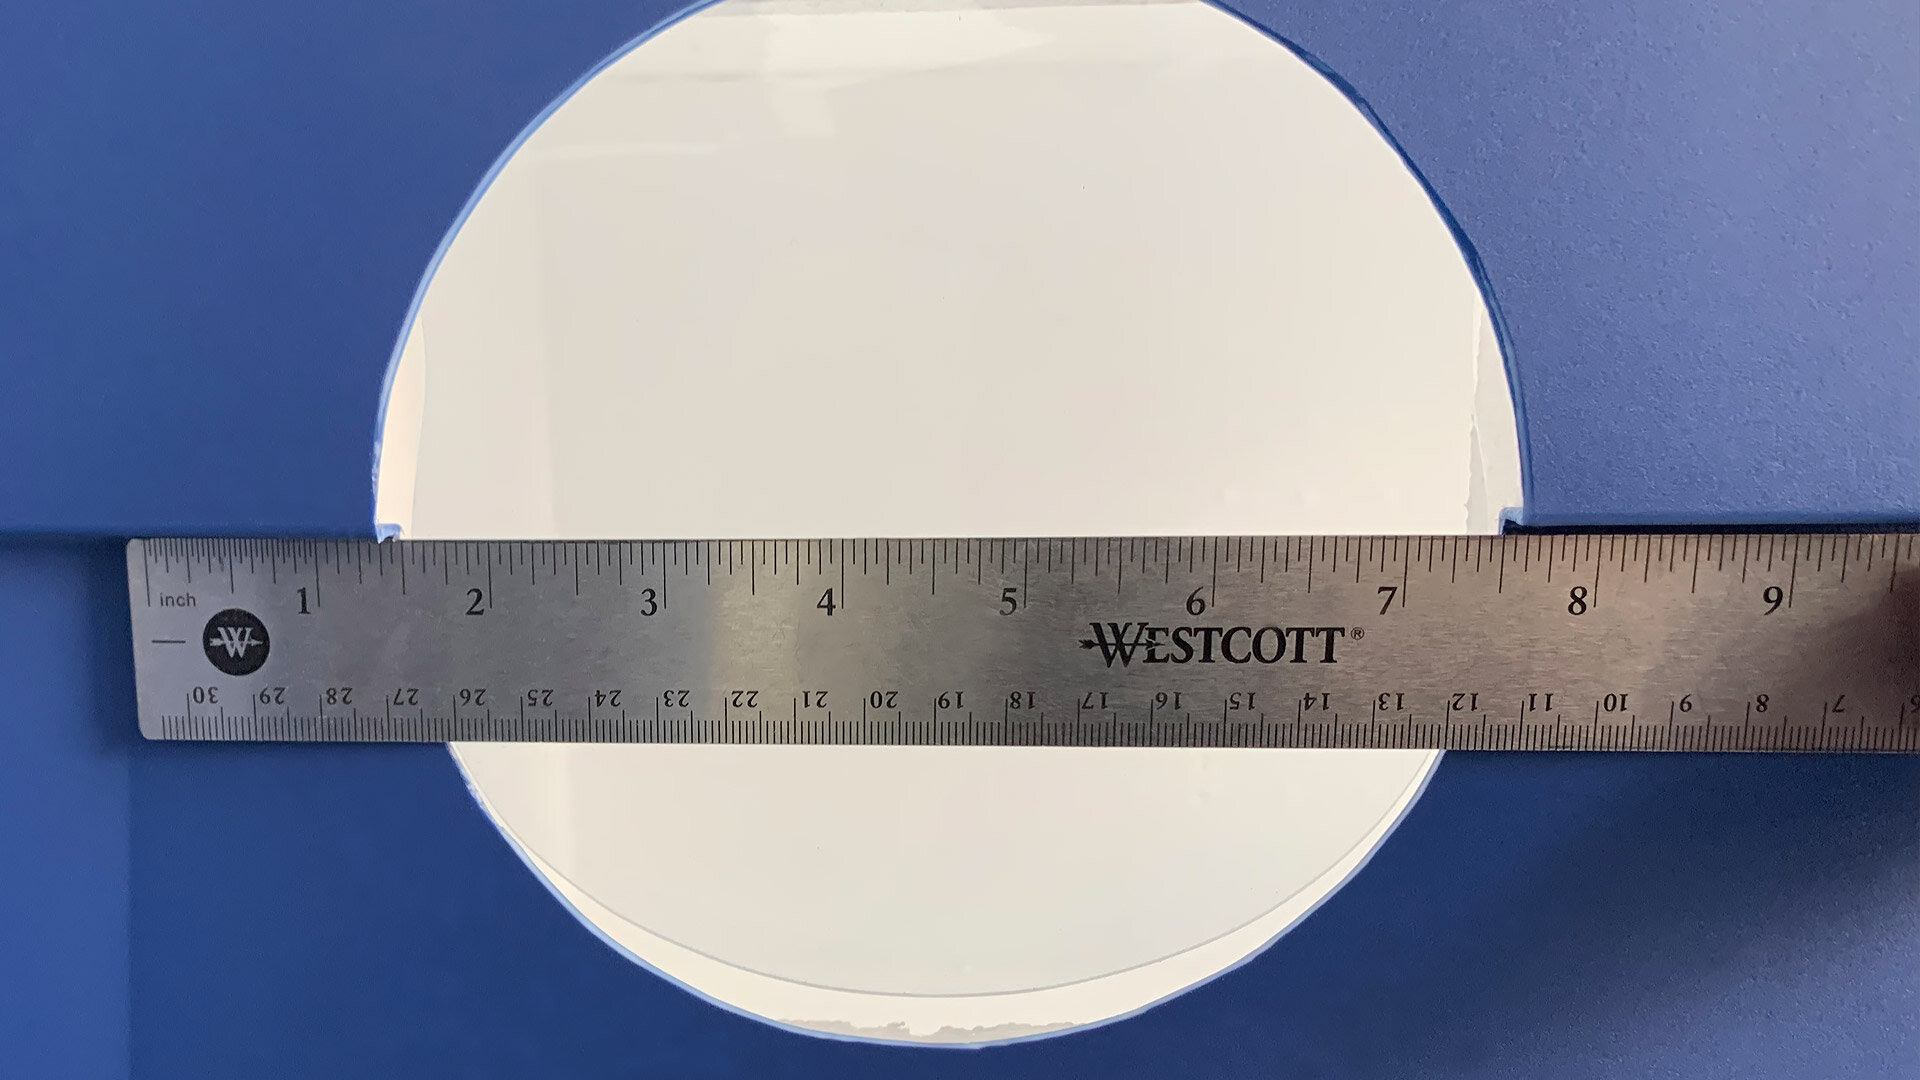
When done correctly, the hole saw leaves you with a rather clean circle. We cleared out any remaining plastic debris with a deburring tool. The ruler above confirms our target location - 1.5” in from the molded crease on the long side of the tote. See tote diagram above for reference.
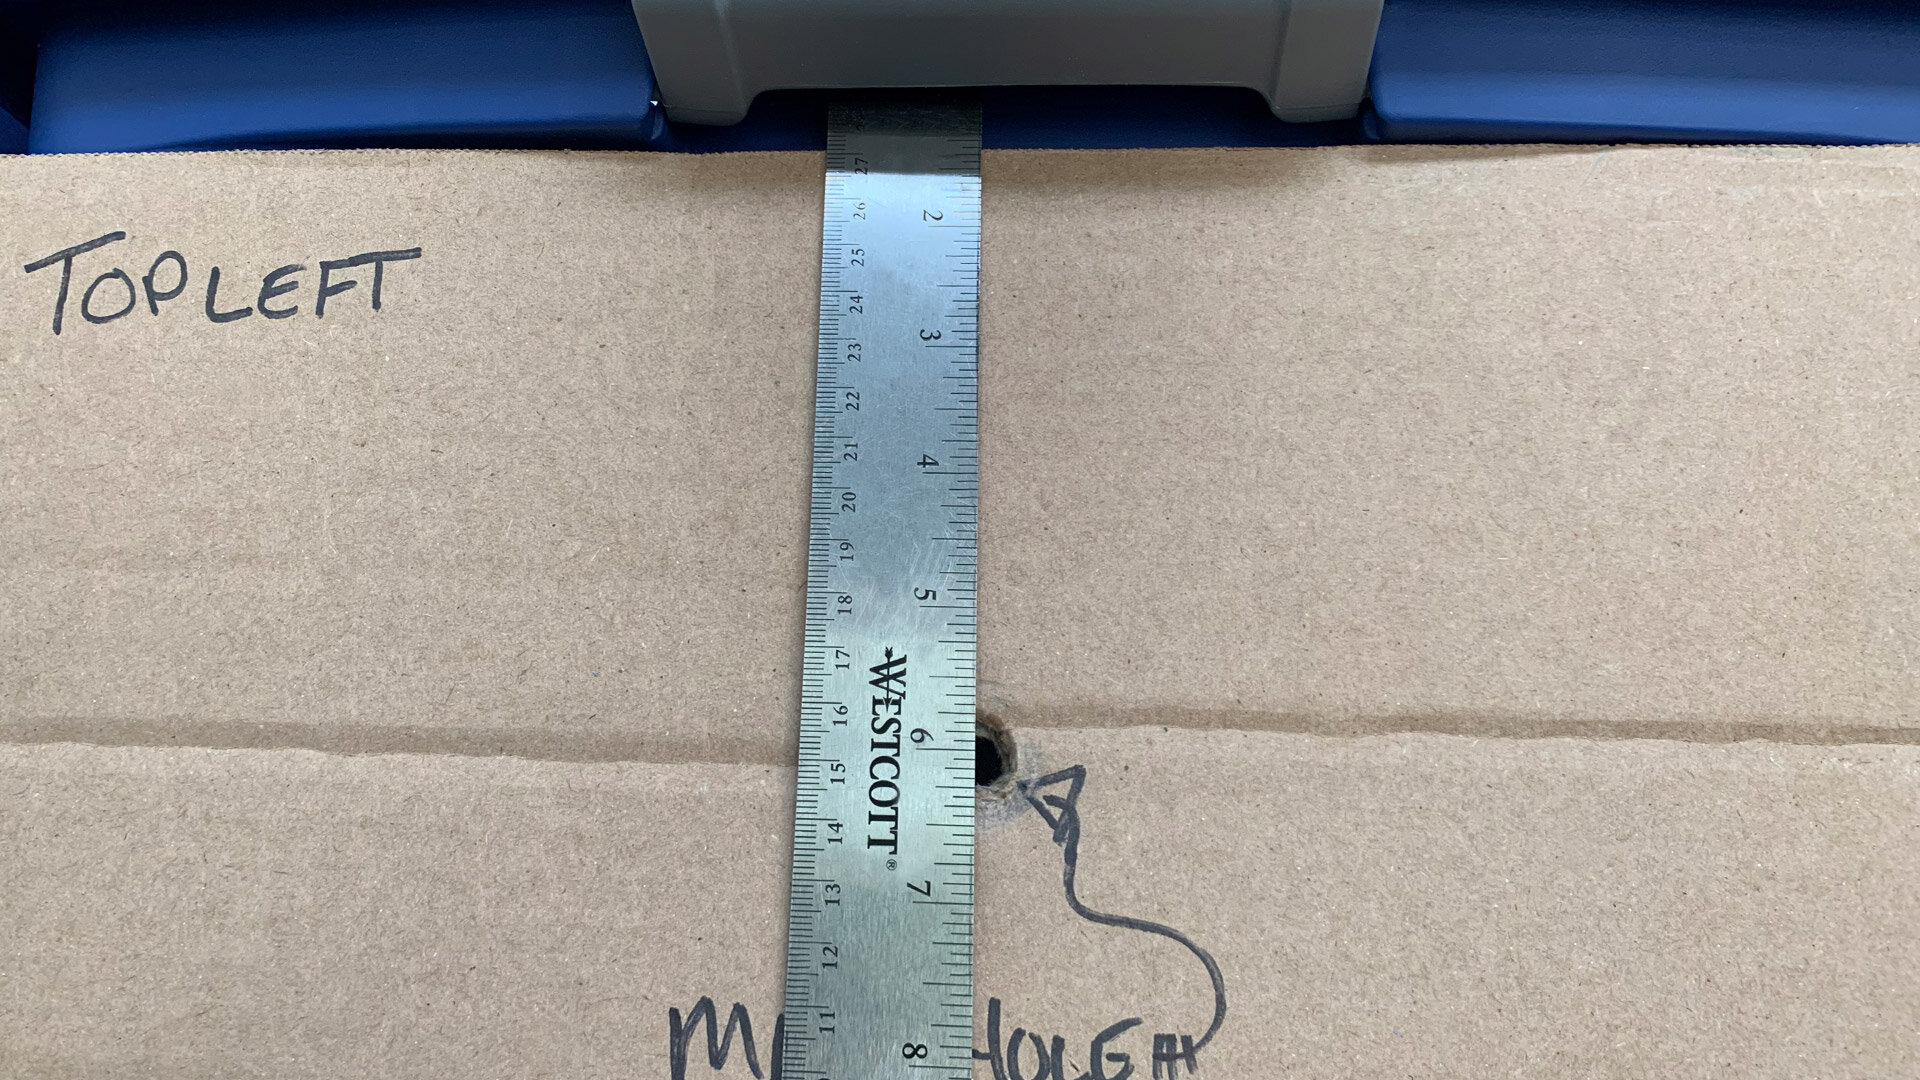
Template time again! This set up is on the short side of the tote below the latch. Note that the ruler will actually slip behind the bottom of the latch until it contacts the pivot point. If you will kindly refer back to the diagram, this is the proper place to measure the door center from. Be certain you are drilling into the correct end of the tote every time so your doors line up with the cooler! See the diagrams for reference.

Another big hole hits the mark - centered and lined up between the two moulded tote creases.
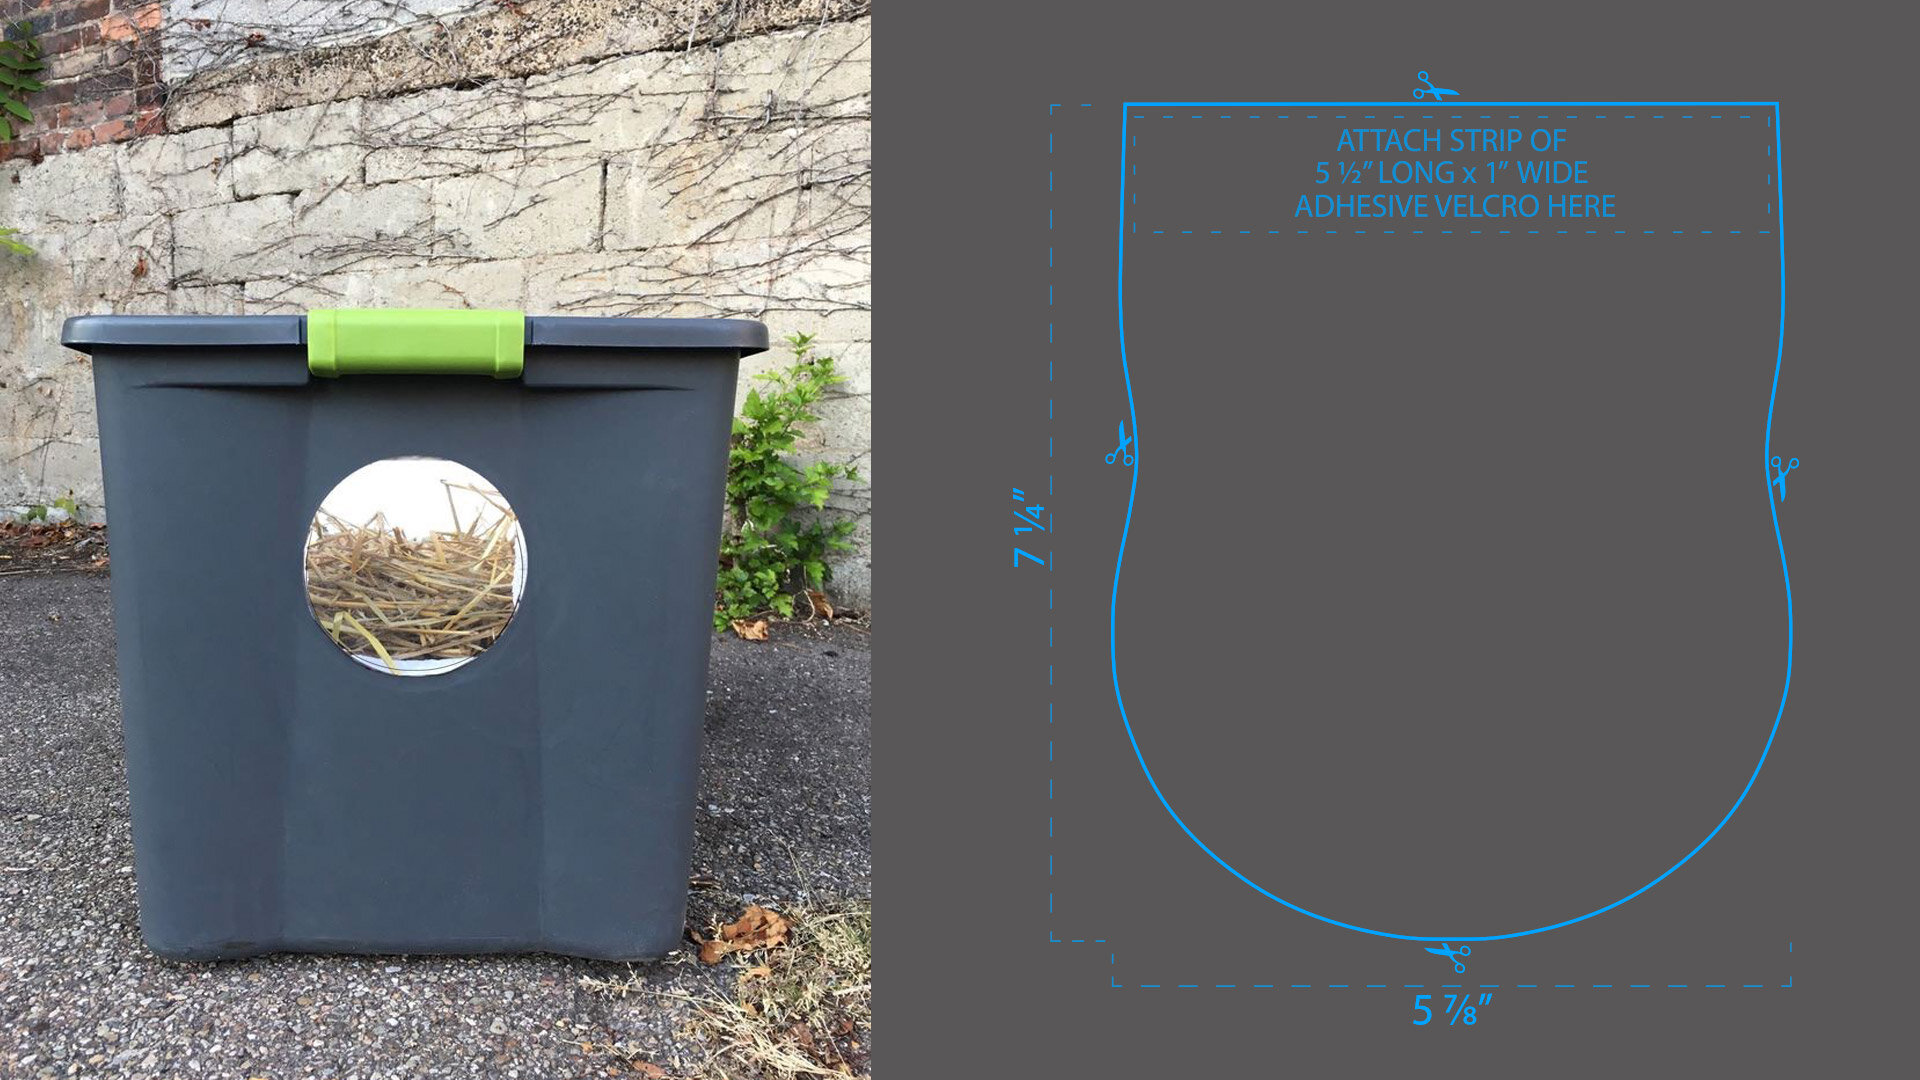
The PVC for the door flaps is easy to cut if you are using good sharp scissors. In case you did not find it yet, there is a full-sized template to print out and use as a guide available for download here. Just be sure you double check dimensions after printing, but before cutting to be sure your printer settings did not change the size slightly. After you cut the first one, we strongly recommend adding the velcro and giving it a test run on a shelter door to see how everything works out. The bottom of the door flap should be just shy of the lower lip of the tote circle so it can swing freely in and out.

Adding Velcro to each door flap goes pretty quickly. We pre-cut all the Velcro strips to size first to keep things flowing, but were excited to learn some suppliers would do the cutting for us for free! Pro tip - determine which side of the Velcro you want on the door and which one on the inside of the tote so that you are not stuck with a mismatched pair. We chose to put the hook Velcro strip on the door and the fuzzy loop side inside the tote, but to each their own.
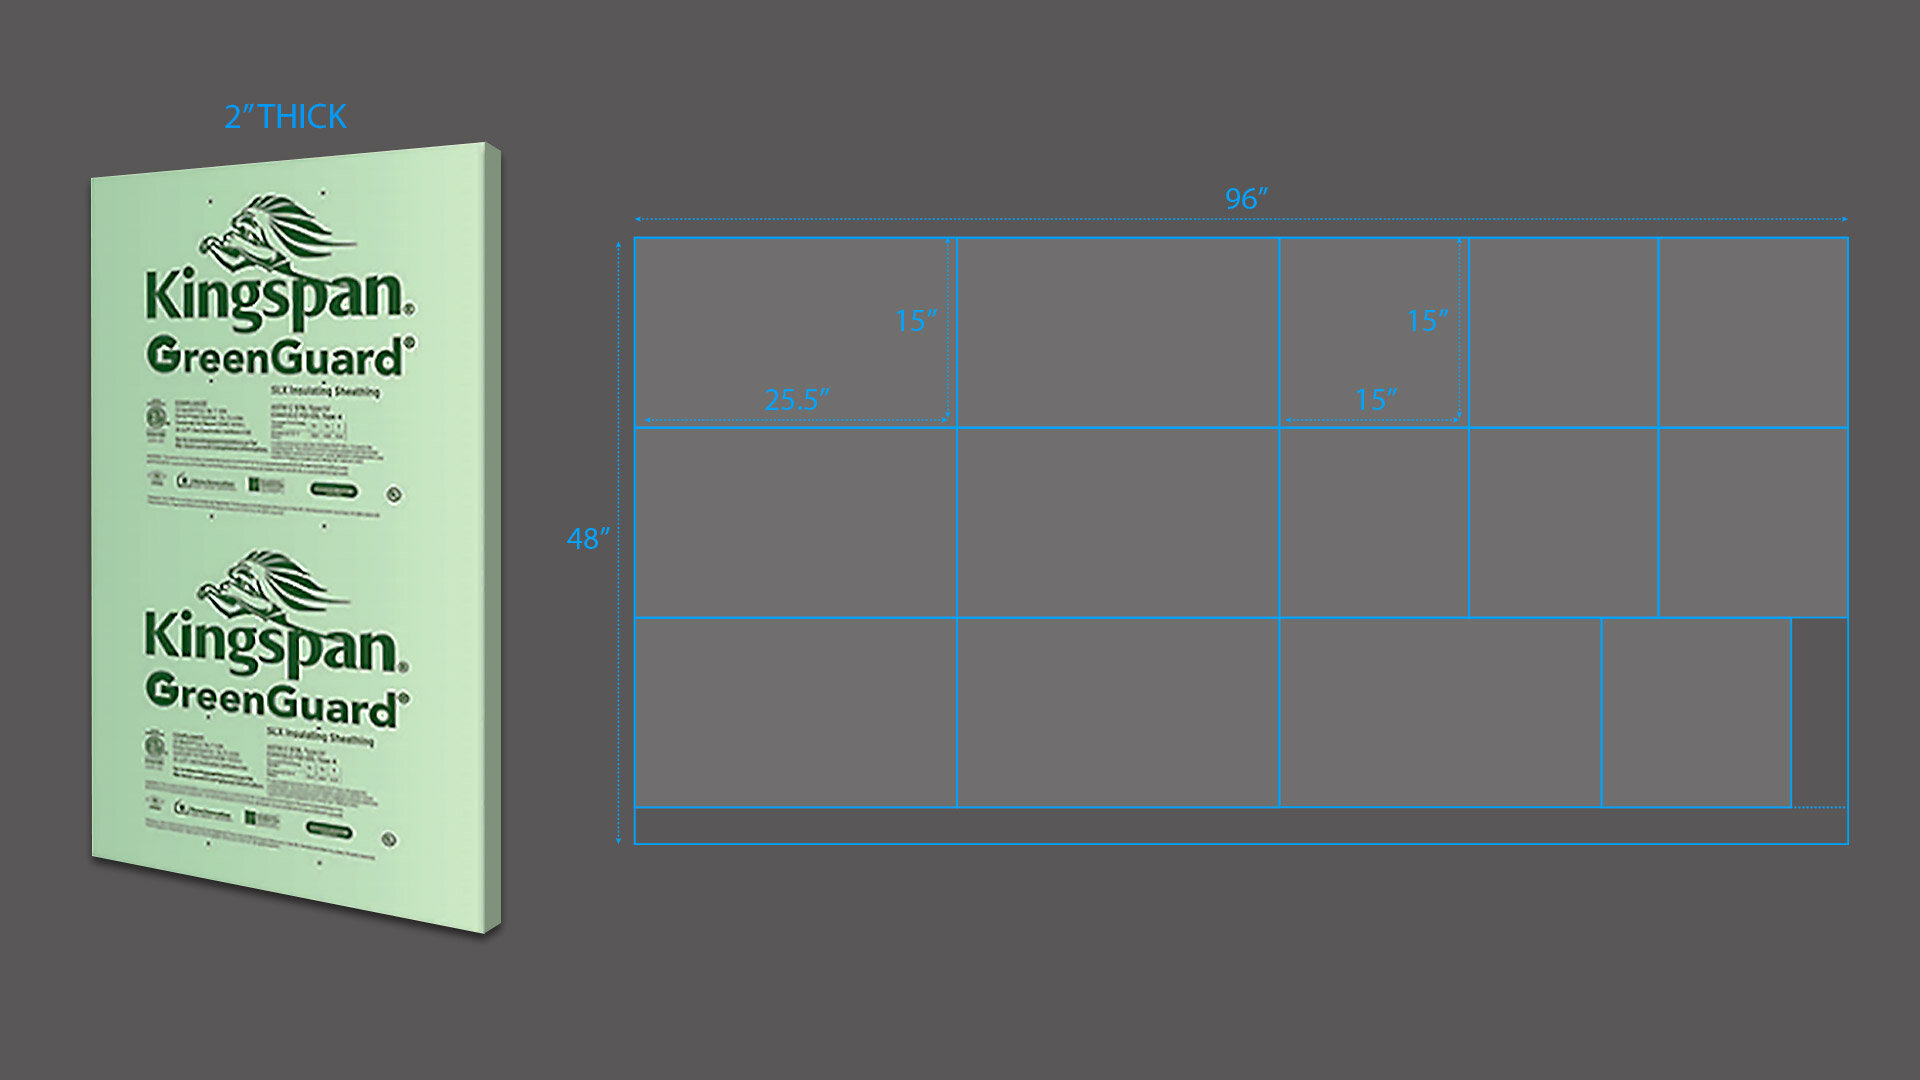
Taking all appropriate precautions and wearing safety glasses, we fired up the table saw to cut our foam to size. As noted before, please be sure you have an experienced operator working on the saw as they can be very dangerous. Please use caution! We set the fence to 15” from the blade and ran all of the insulation board through the table saw the long way first. From there, we counted the long strips into stacks, reset the fence and cut all the 25.5” pieces. (Counting as you go is pretty important to be sure you end up with the right quantity of each part.) Finally, we moved the fence one more time to cut all of the 15” long pieces. The little cut-off scraps can be used too, so keep them handy.
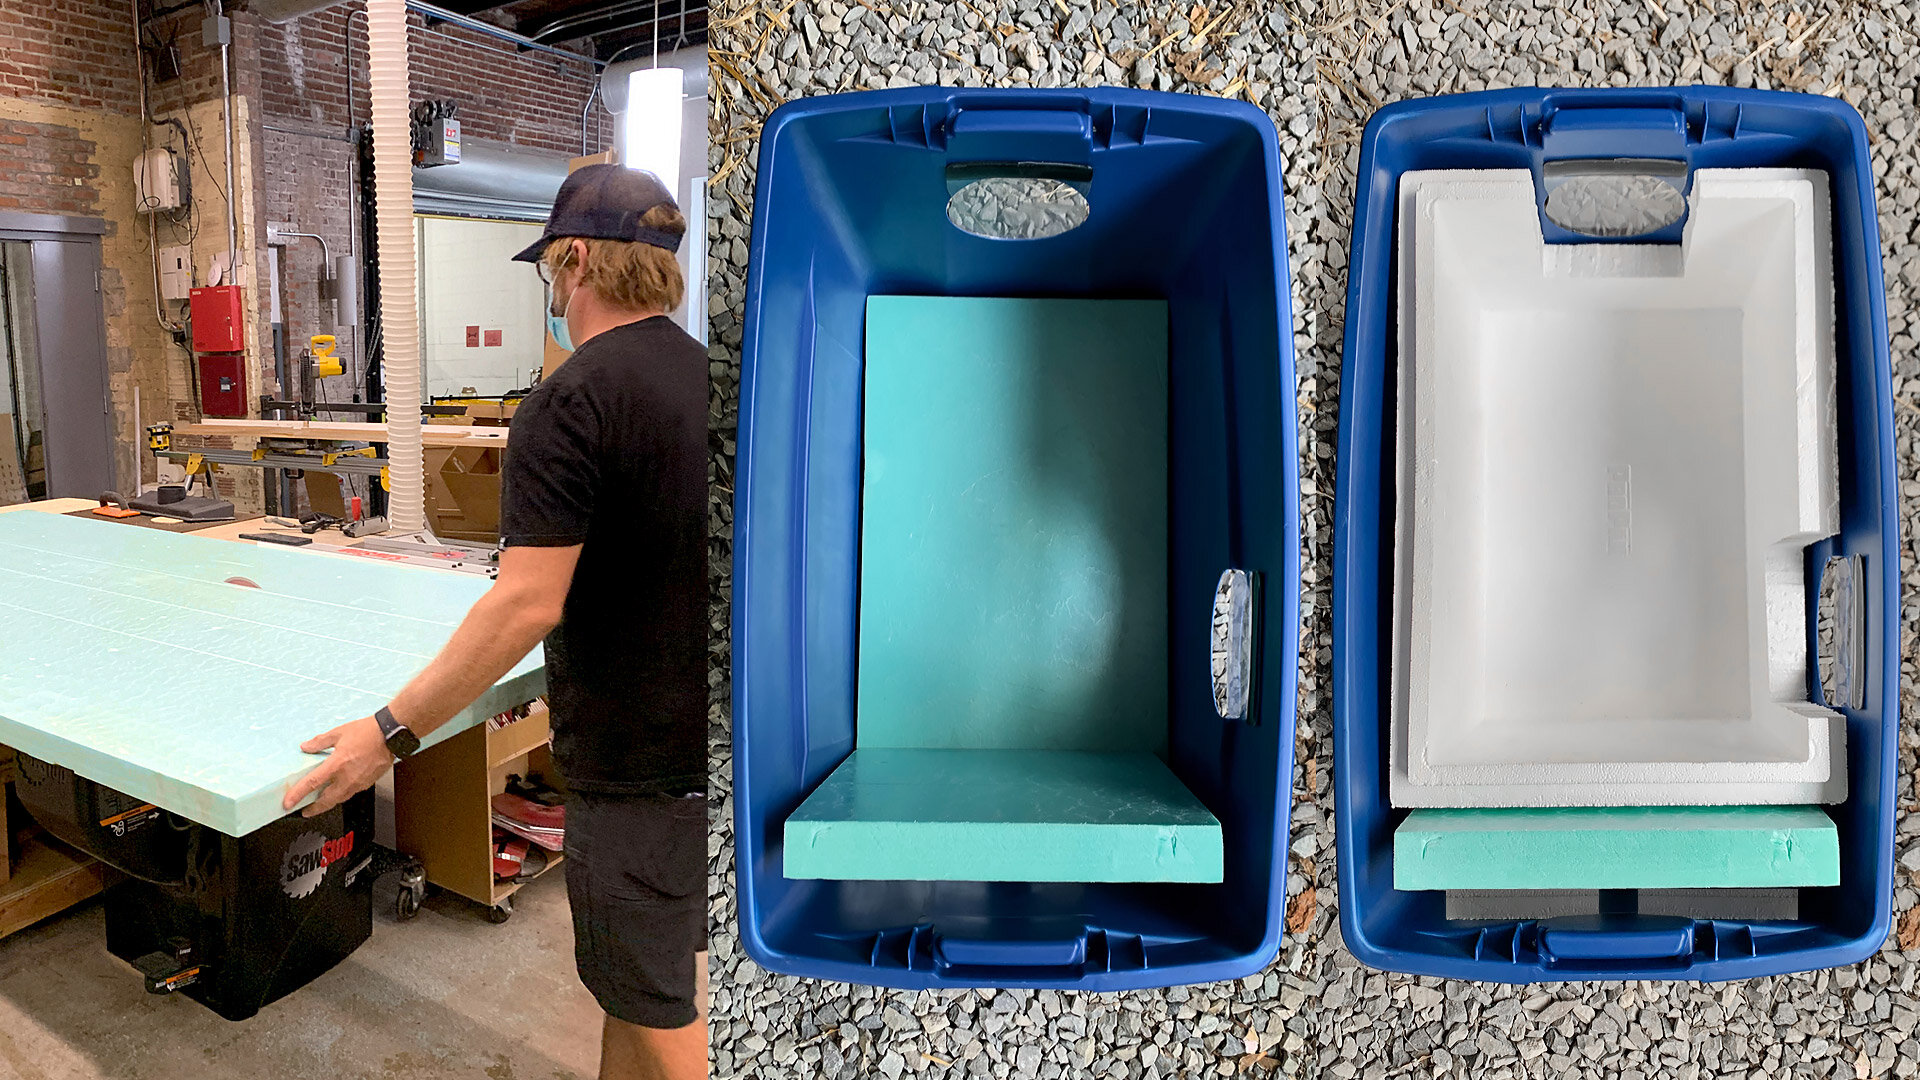
Adding the foam to the cooler is fairly easy. The long section goes in the bottom and the short one stands up vertically at the end opposite the circular tote door. The two small, square sections of white foam that were removed from the cooler to make the doors get wedged behind the upright green foam slab and the cooler gets set into place. You can also add leftover cut-off scraps of green foam to fill the gap behind the vertical piece of insulation if you want to. The most critical thing about this step is to be sure the cooler is wedged in place and the door flaps swing freely in and out without hitting the cooler. Keeping the cooler snug will help ensure that the position does not shift and cause the door flap on the long side to become partially blocked.

Now you are ready to stuff the coolers with straw and add the seasonings! Usually the straw bales each separate naturally into 10-12 sections. These are about the right size to add one section to each cooler, but adjust as necessary. The idea is to break up the straw and create a soft little nest the cats can snuggle into. When all is done, the straw should not block the door flaps. Sprinkle just a little of the diatomaceous earth into the straw and add a tiny pinch of catnip to each entry to attract interest. Put the cooler lid on and then latch the tote lid closed. The underside of the tote lid has some fins that will bite into the lid of the inner cooler if you press down on the top once assembled.
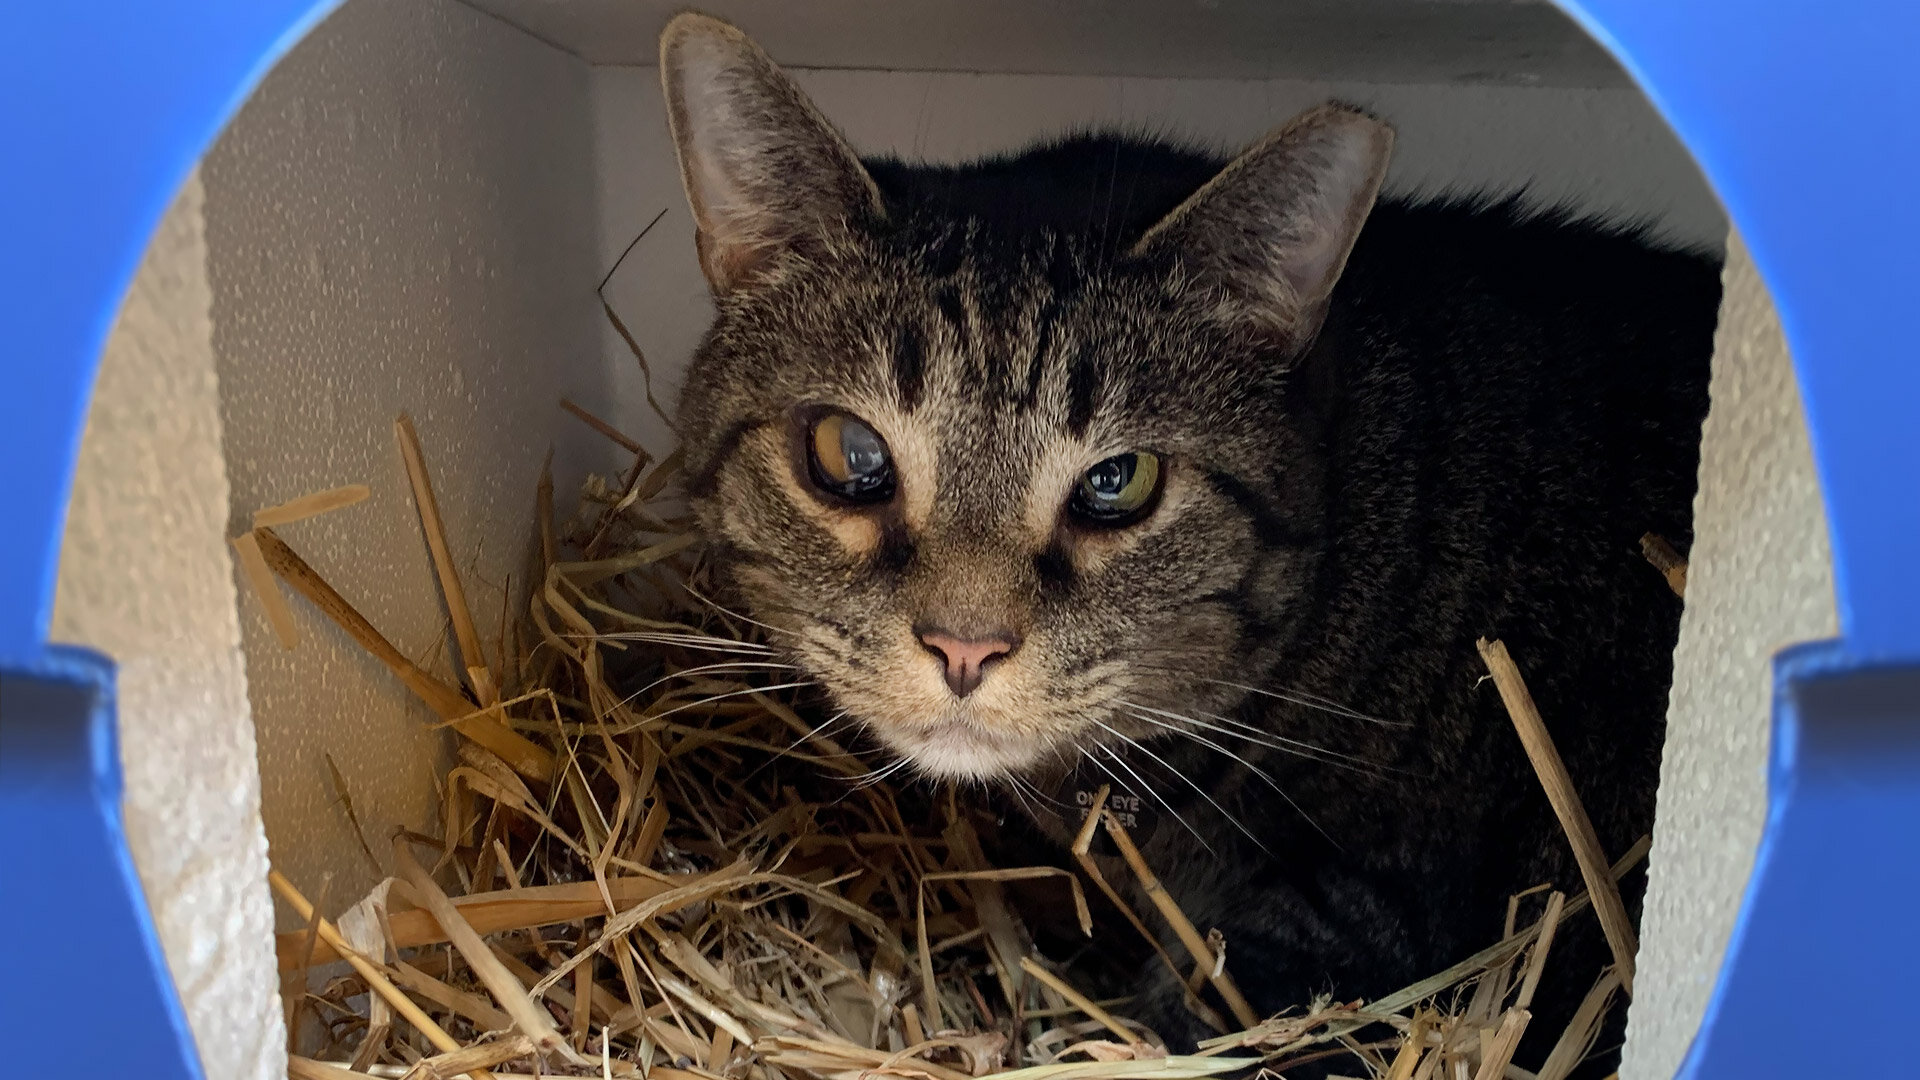
Go forth and make some outdoor cats happy! The shelters will make a big difference to community cats and we are hopeful that this guide helps inspire other groups to up their shelter party game. Good luck, be safe and remember that at the end of the day, this is all for the well-being of our furry outdoor friends!